
Making Coffee: DIY From Tree to Cup

Imagine the smell of freshly brewed coffee in the morning. Maybe you’ve even got a cup in your hand right now. It’s an international favorite, yet so many of us know little more about coffee than how to turn on our machines at home, or how to order it at the cafe.
Coming from Canada and New Zealand, neither of us have been around the coffee harvesting and production process (although John and the rest of the Kiwi’s do know a thing or two about how to roast, brew and drink it). Sorry Canada, but Tim Horton’s doesn’t make the cut here.
We’ve been lucky enough to be living in the southern forest of Ecuador in the “Valley of Longevity” (more on that in another post), for the past 6 weeks and our property is blooming with…coffee trees!


So of course, we had to give the coffee making process a try for ourselves. It was super interesting, fun at the start, very time consuming, sometimes frustrating, but all-in-all a rewarding experience we will cherish forever.
We only wish we could share the experience with all of you first hand, but this is the next best way. And if you ever find yourself in a space with coffee trees, here’s our method for DIY coffee.
You Can Do It Yourself!
The process described below is for you to make coffee at home, from tree to cup. I have not gone into detail about how it is processed at a factory in large scale, although the techniques we used are similar. I have not described the different methods or any of the science behind coffee production, as it is quite complex and I still have plenty to learn.
This is simply the best way for you to see and understand the process and try it for yourself.
1. Pick Your Fruit

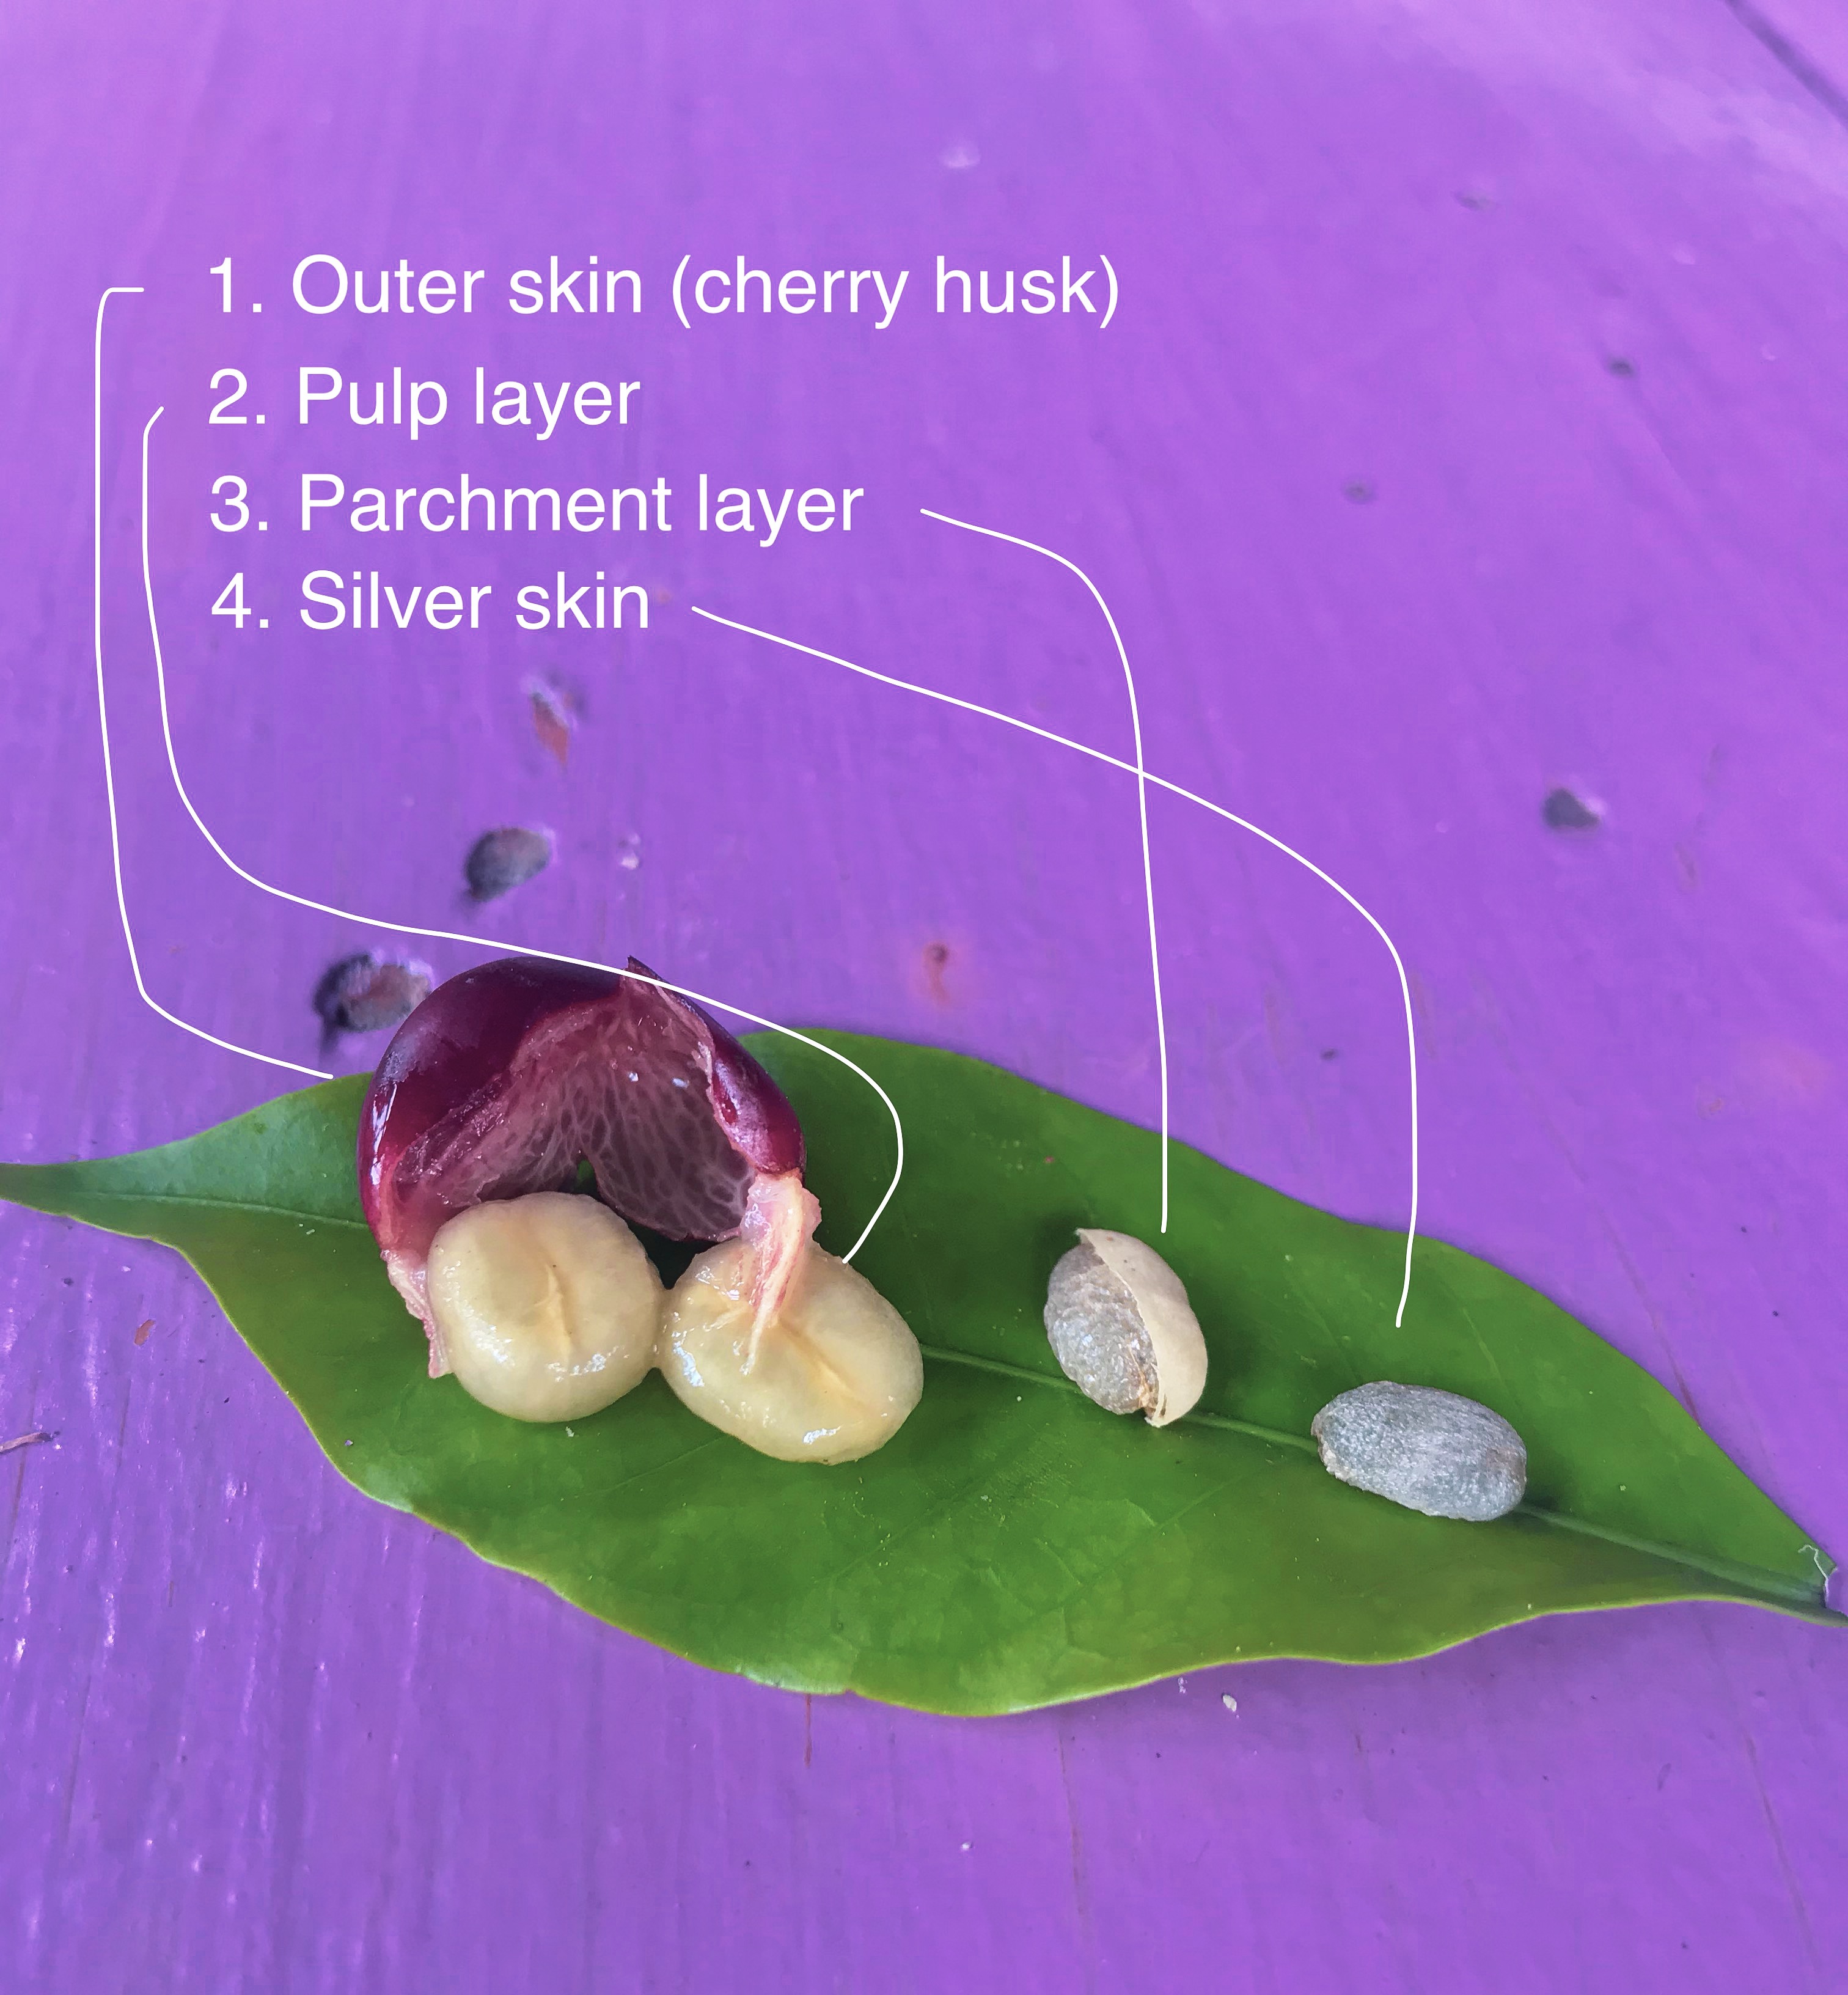
Coffee beans are actually found inside of cherries! The coffee tree is filled with coffee cherries of varying ripeness, so it’s up to you to pick the right fruit. Ideally you want to pick the cherries that range from bright to deep red. When they are slightly brown, they’re over ripe and will be starting to decompose. Leave those guys behind.

If you’re feeling adventurous, have a go at eating the coffee cherry! It’s decently sweet with pulp and the skin is slightly bitter. The beans are like pits, you can eat them too but they aren’t very satisfying.
2. Husk the Cherries

Now the fun starts. You need to get the beans out of the cherries! You can use a knife to cut the cherry open and take the beans out, or just squeeze the bottom of the cherry and the beans will pop nicely out of the top. Caution: sometimes the beans pop out at a high velocity and can be lost outside of your workspace, or attack others in the vecinity.
Once out of the cherry, you will notice that your beans are covered with a pulp layer and can be quite slimy. Place your slimy beans into a bowl.
Coffee Hack: you can dry your empty coffee cherry husks and use them to make a high antioxidant tea! You can dry up some of the coffee tree leaves to mix into the tea too.
3. Soak Your Beans

Once de-husked, your beans need to shed their pulp layer. The easiest way to do this at home is by soaking the beans in water. This should take between 24-48 hours, depending on how many beans you have.
Fill your bowl with water and mix around the beans. After about 24 hours, drain the beans with a sieve. You will notice that the layer of slime is mostly gone and the bean feels rough to touch. If it is not entirely gone, rinse the beans and then refill the bowl of beans with water and let soak for another 24 hours.
4. Dry Your Beans

Now that the pulp is gone, we need to dry the beans so that we can remove the bean from their parchment. If you’re in a place that coffee beans are growing, chances are you’ll have access to sun. But if not, food dehydrators work too.

We dried our beans in the sun, flipping them every 5 hours or so, to avoid rotting. This took us about 2 days for the beans to be completely dry, because the sun was intermittent.
5. Remove the Parchment
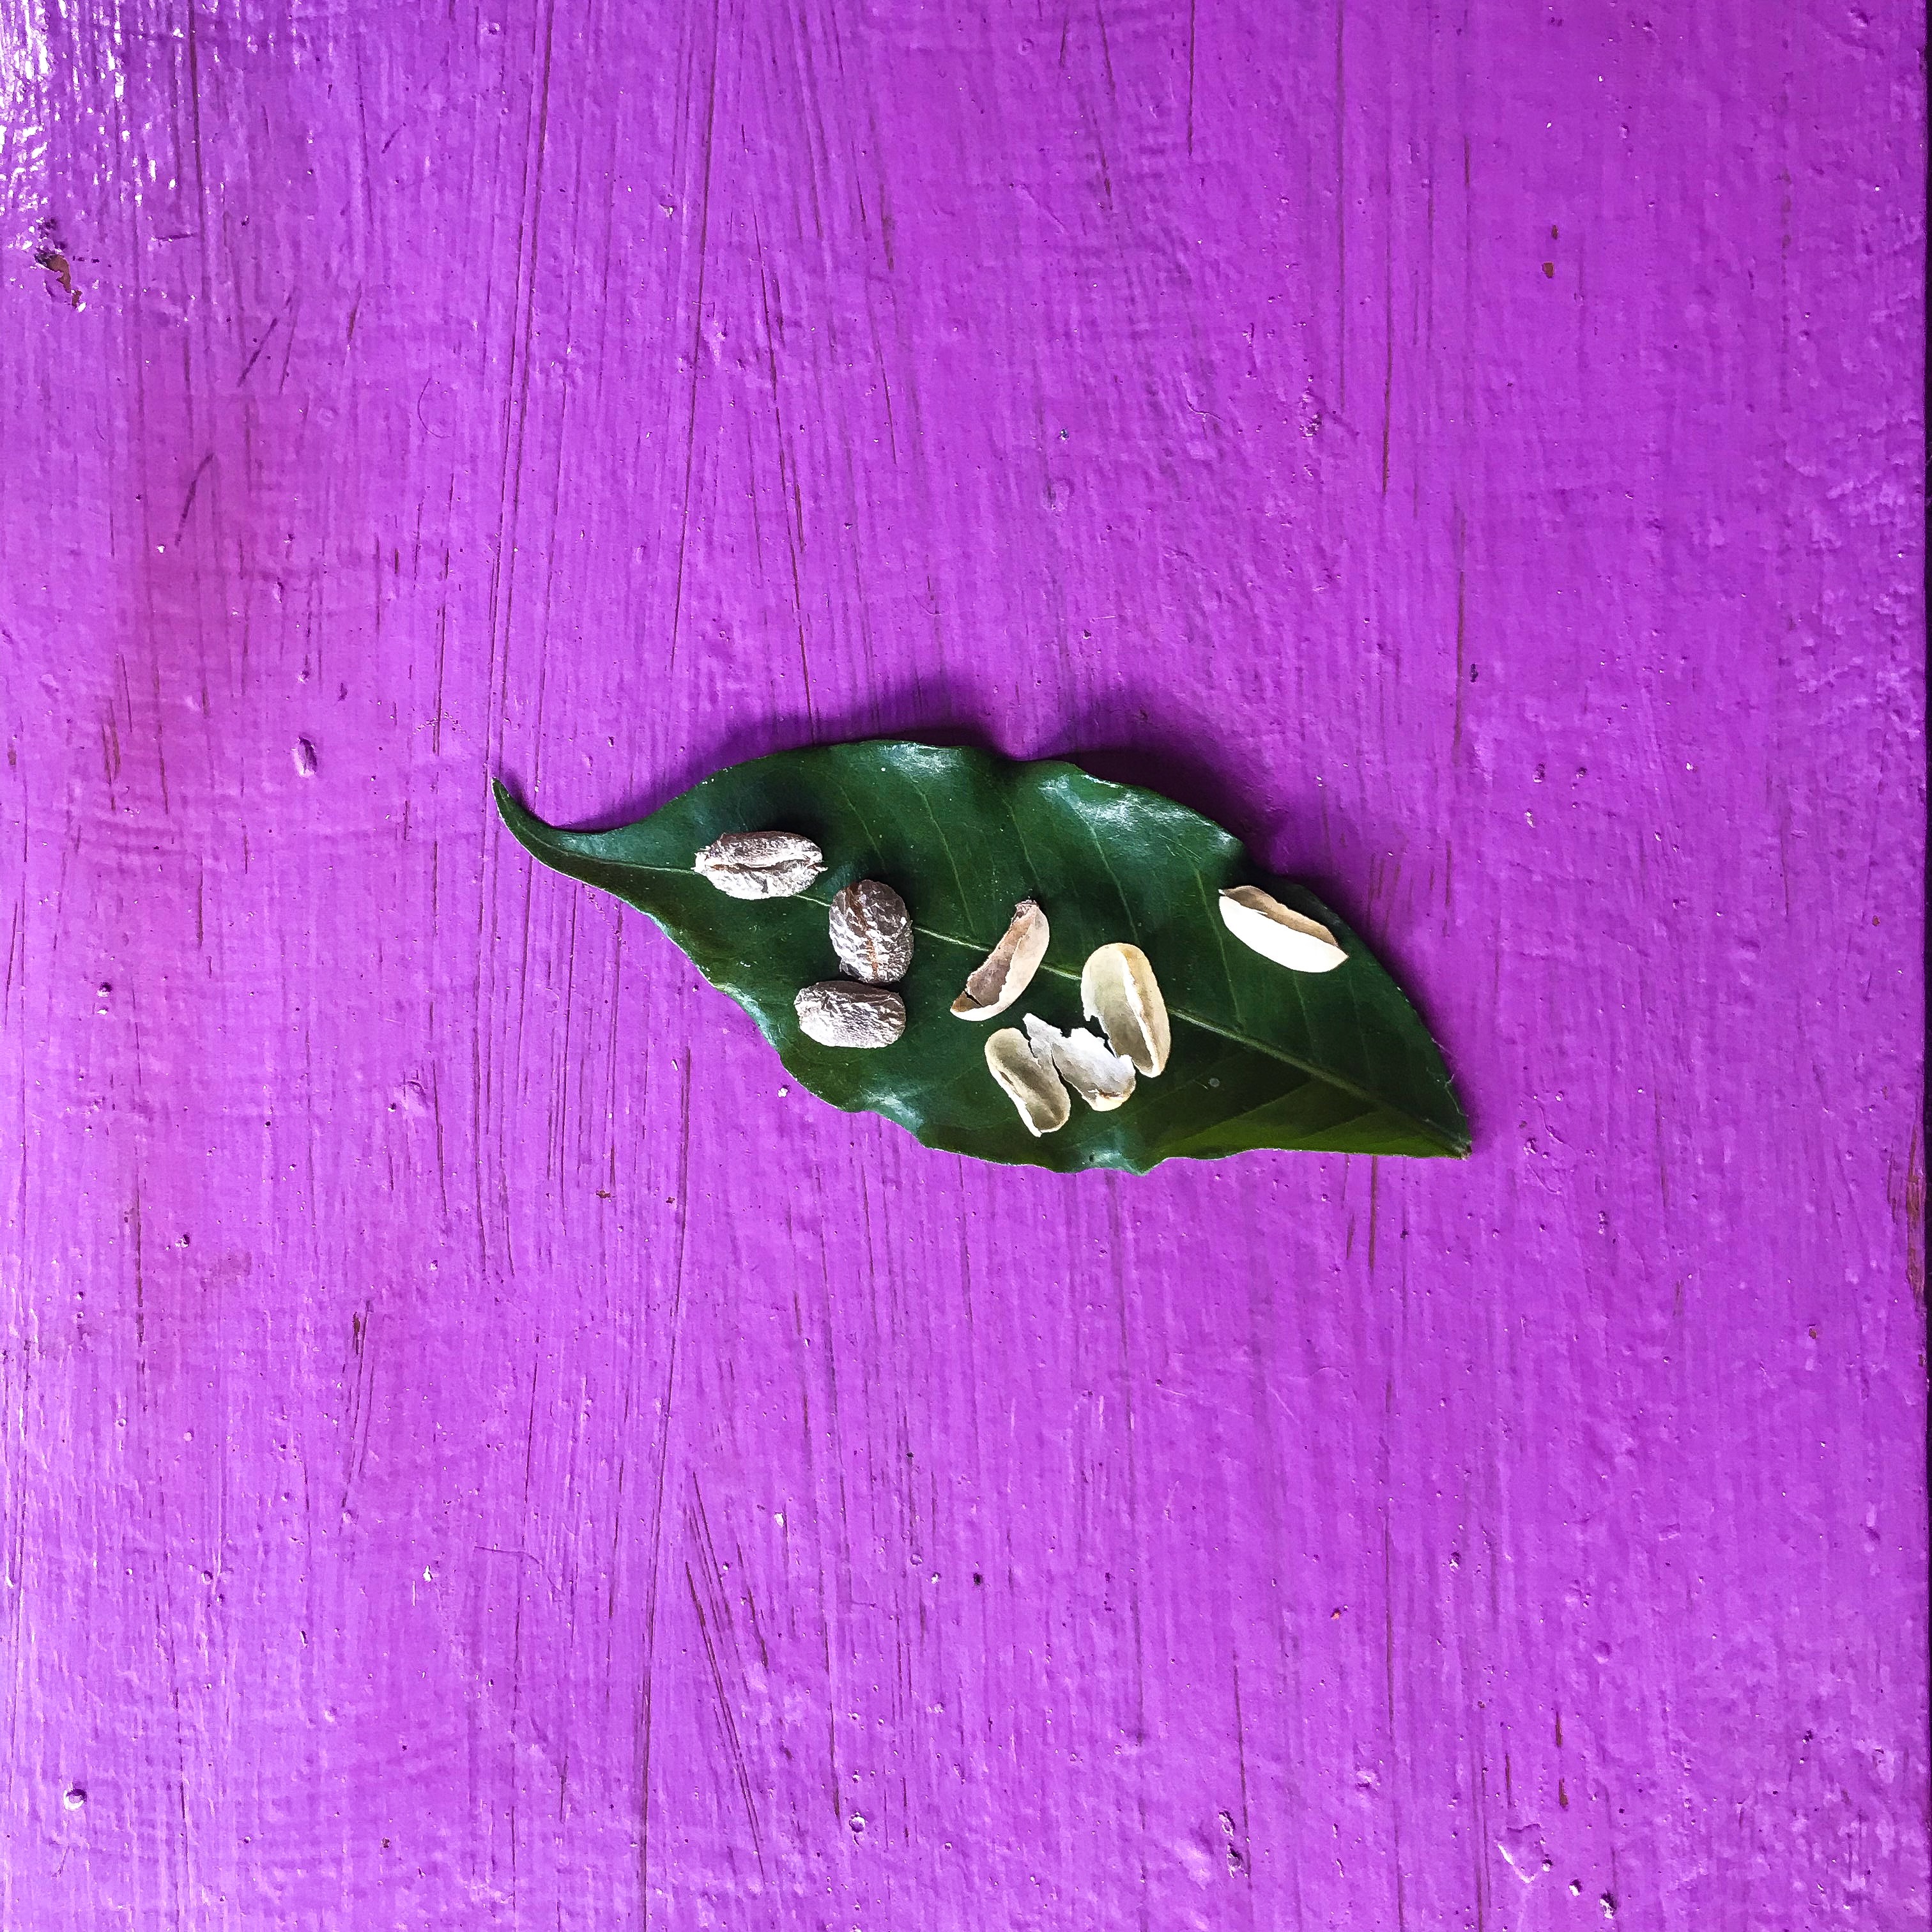
Before the beans are dried it’s hard to see how you’ll be able to remove them from their parchments. But once dried, the parchment cracks and is almost inviting you to undress the bean. It’s a tedious job, so make sure you’ve got some music playing or a tv show to watch.
Not much can be done with the parchments. It’s biowaste at its finest. If you have a compost or chickens, toss it their way.
After the de-parchment process, you will be left with your coffee beans in their silver skin.
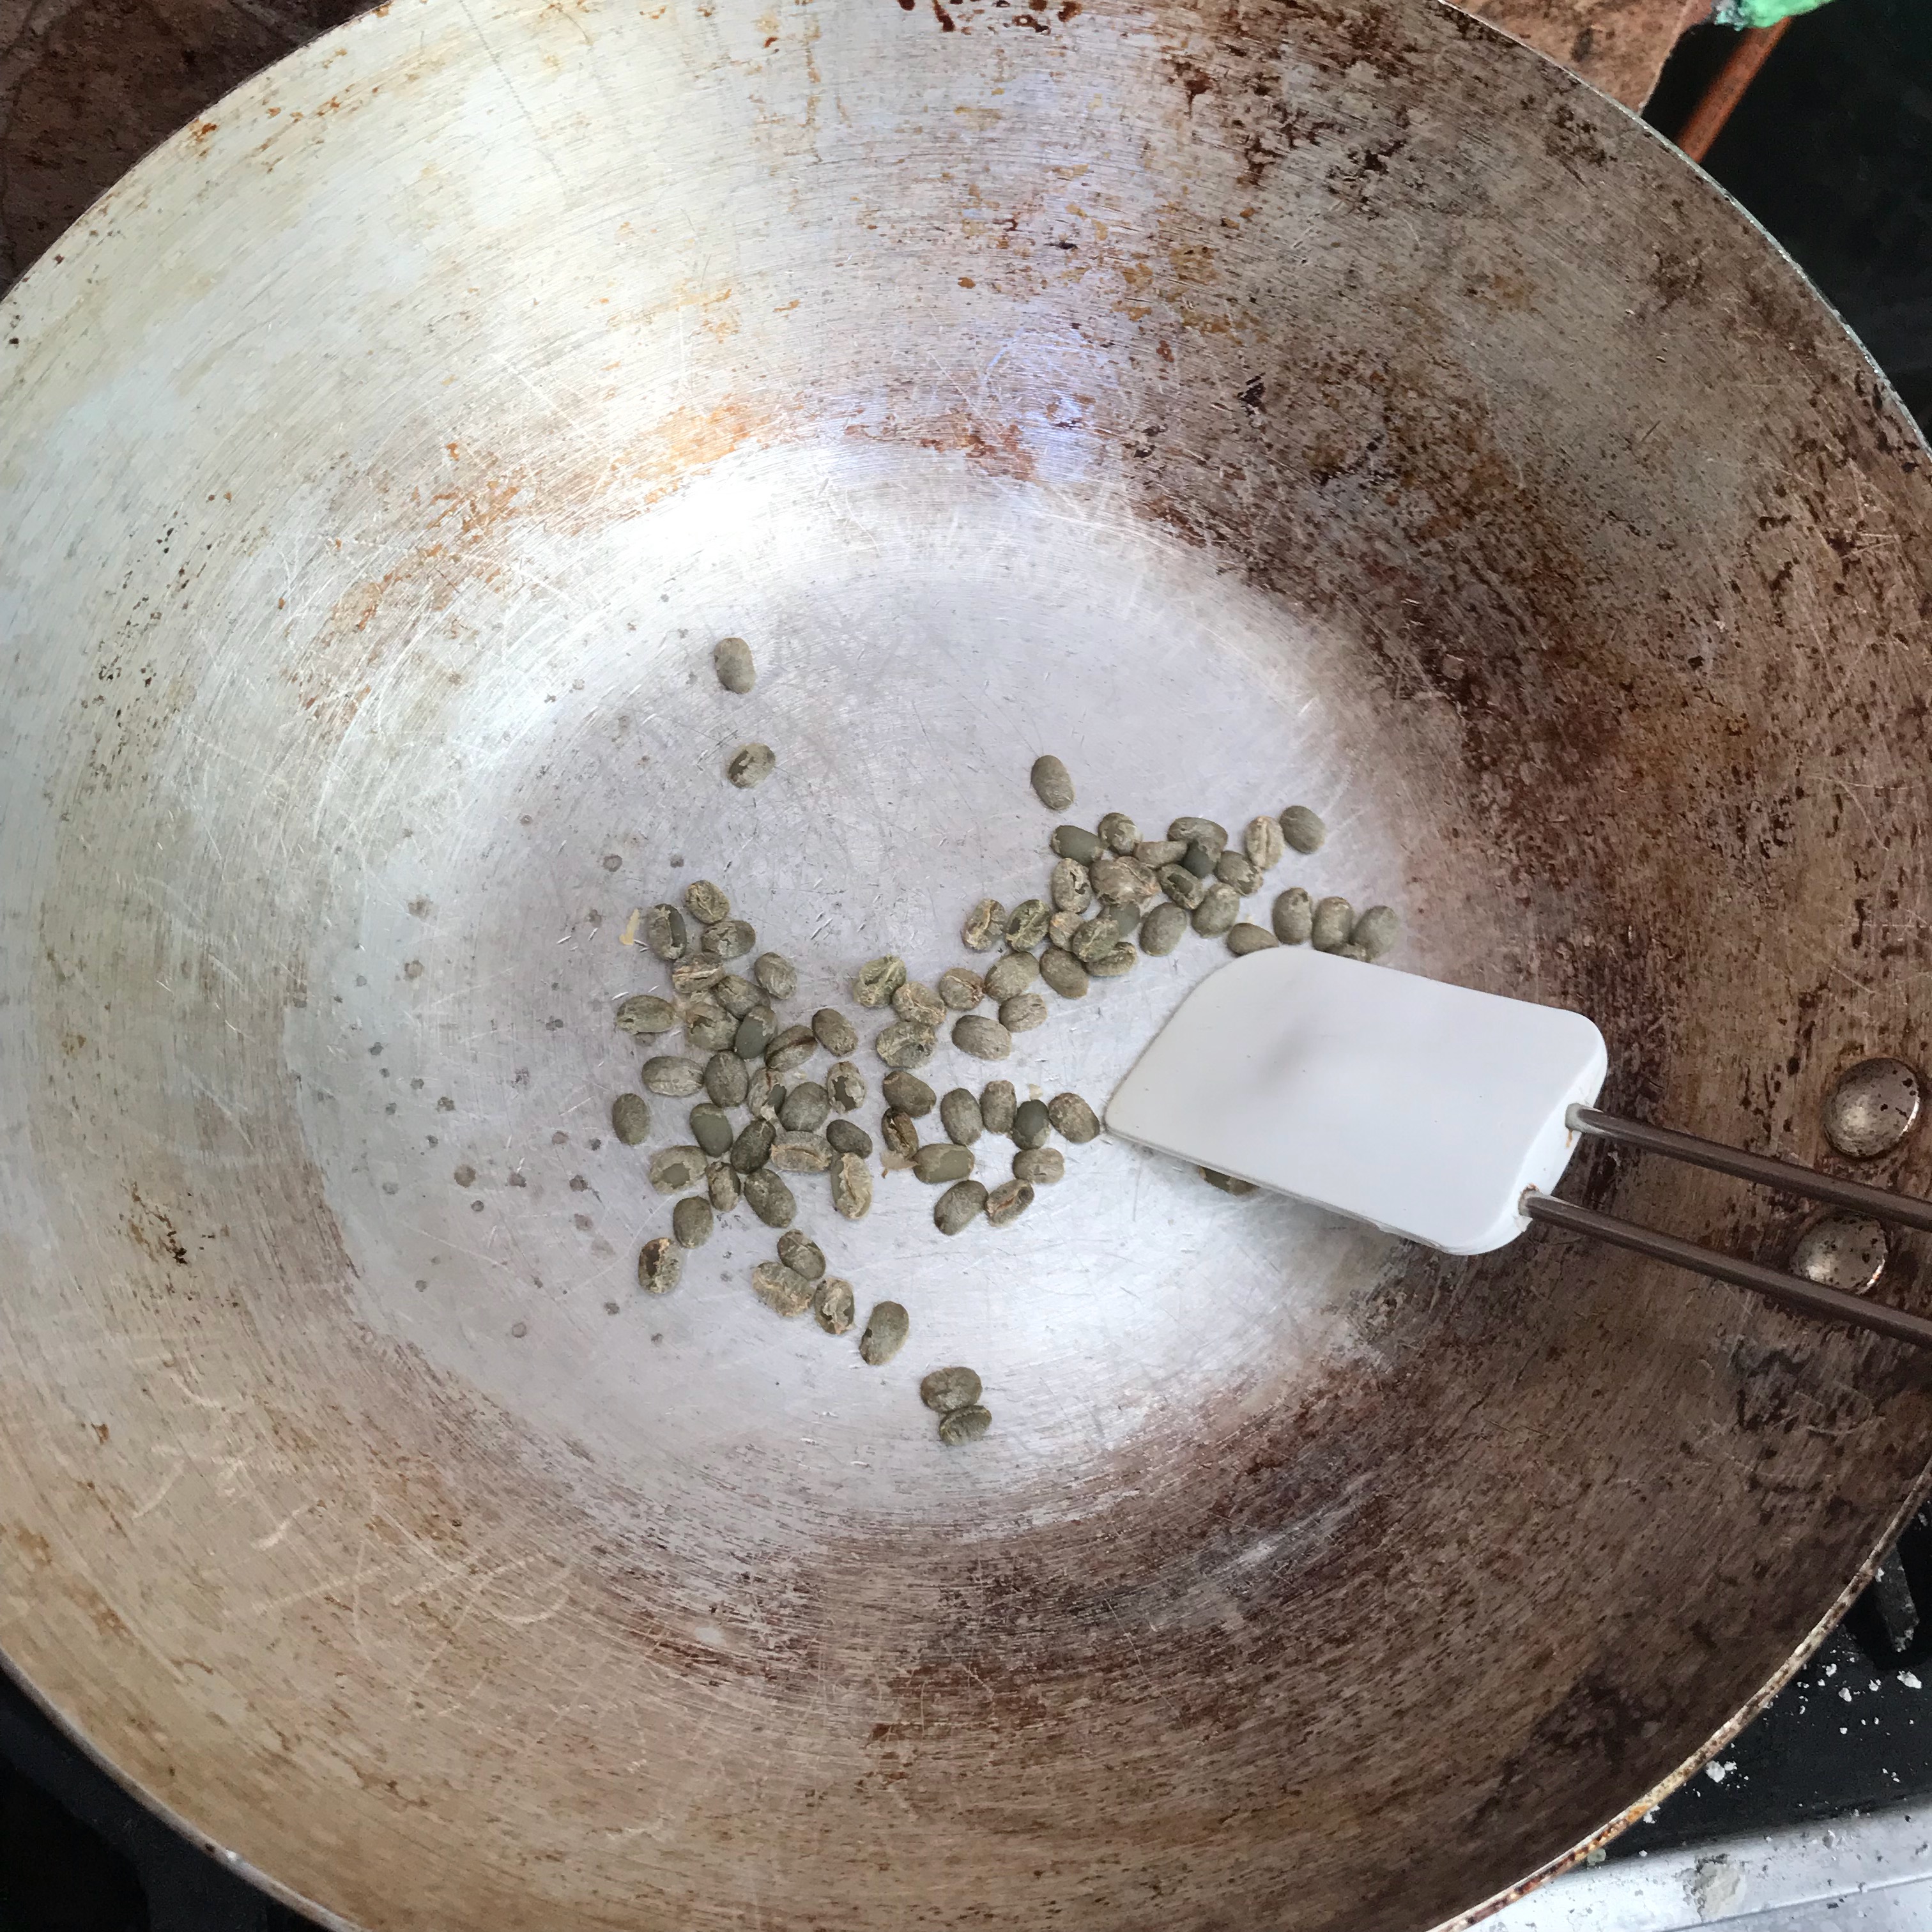
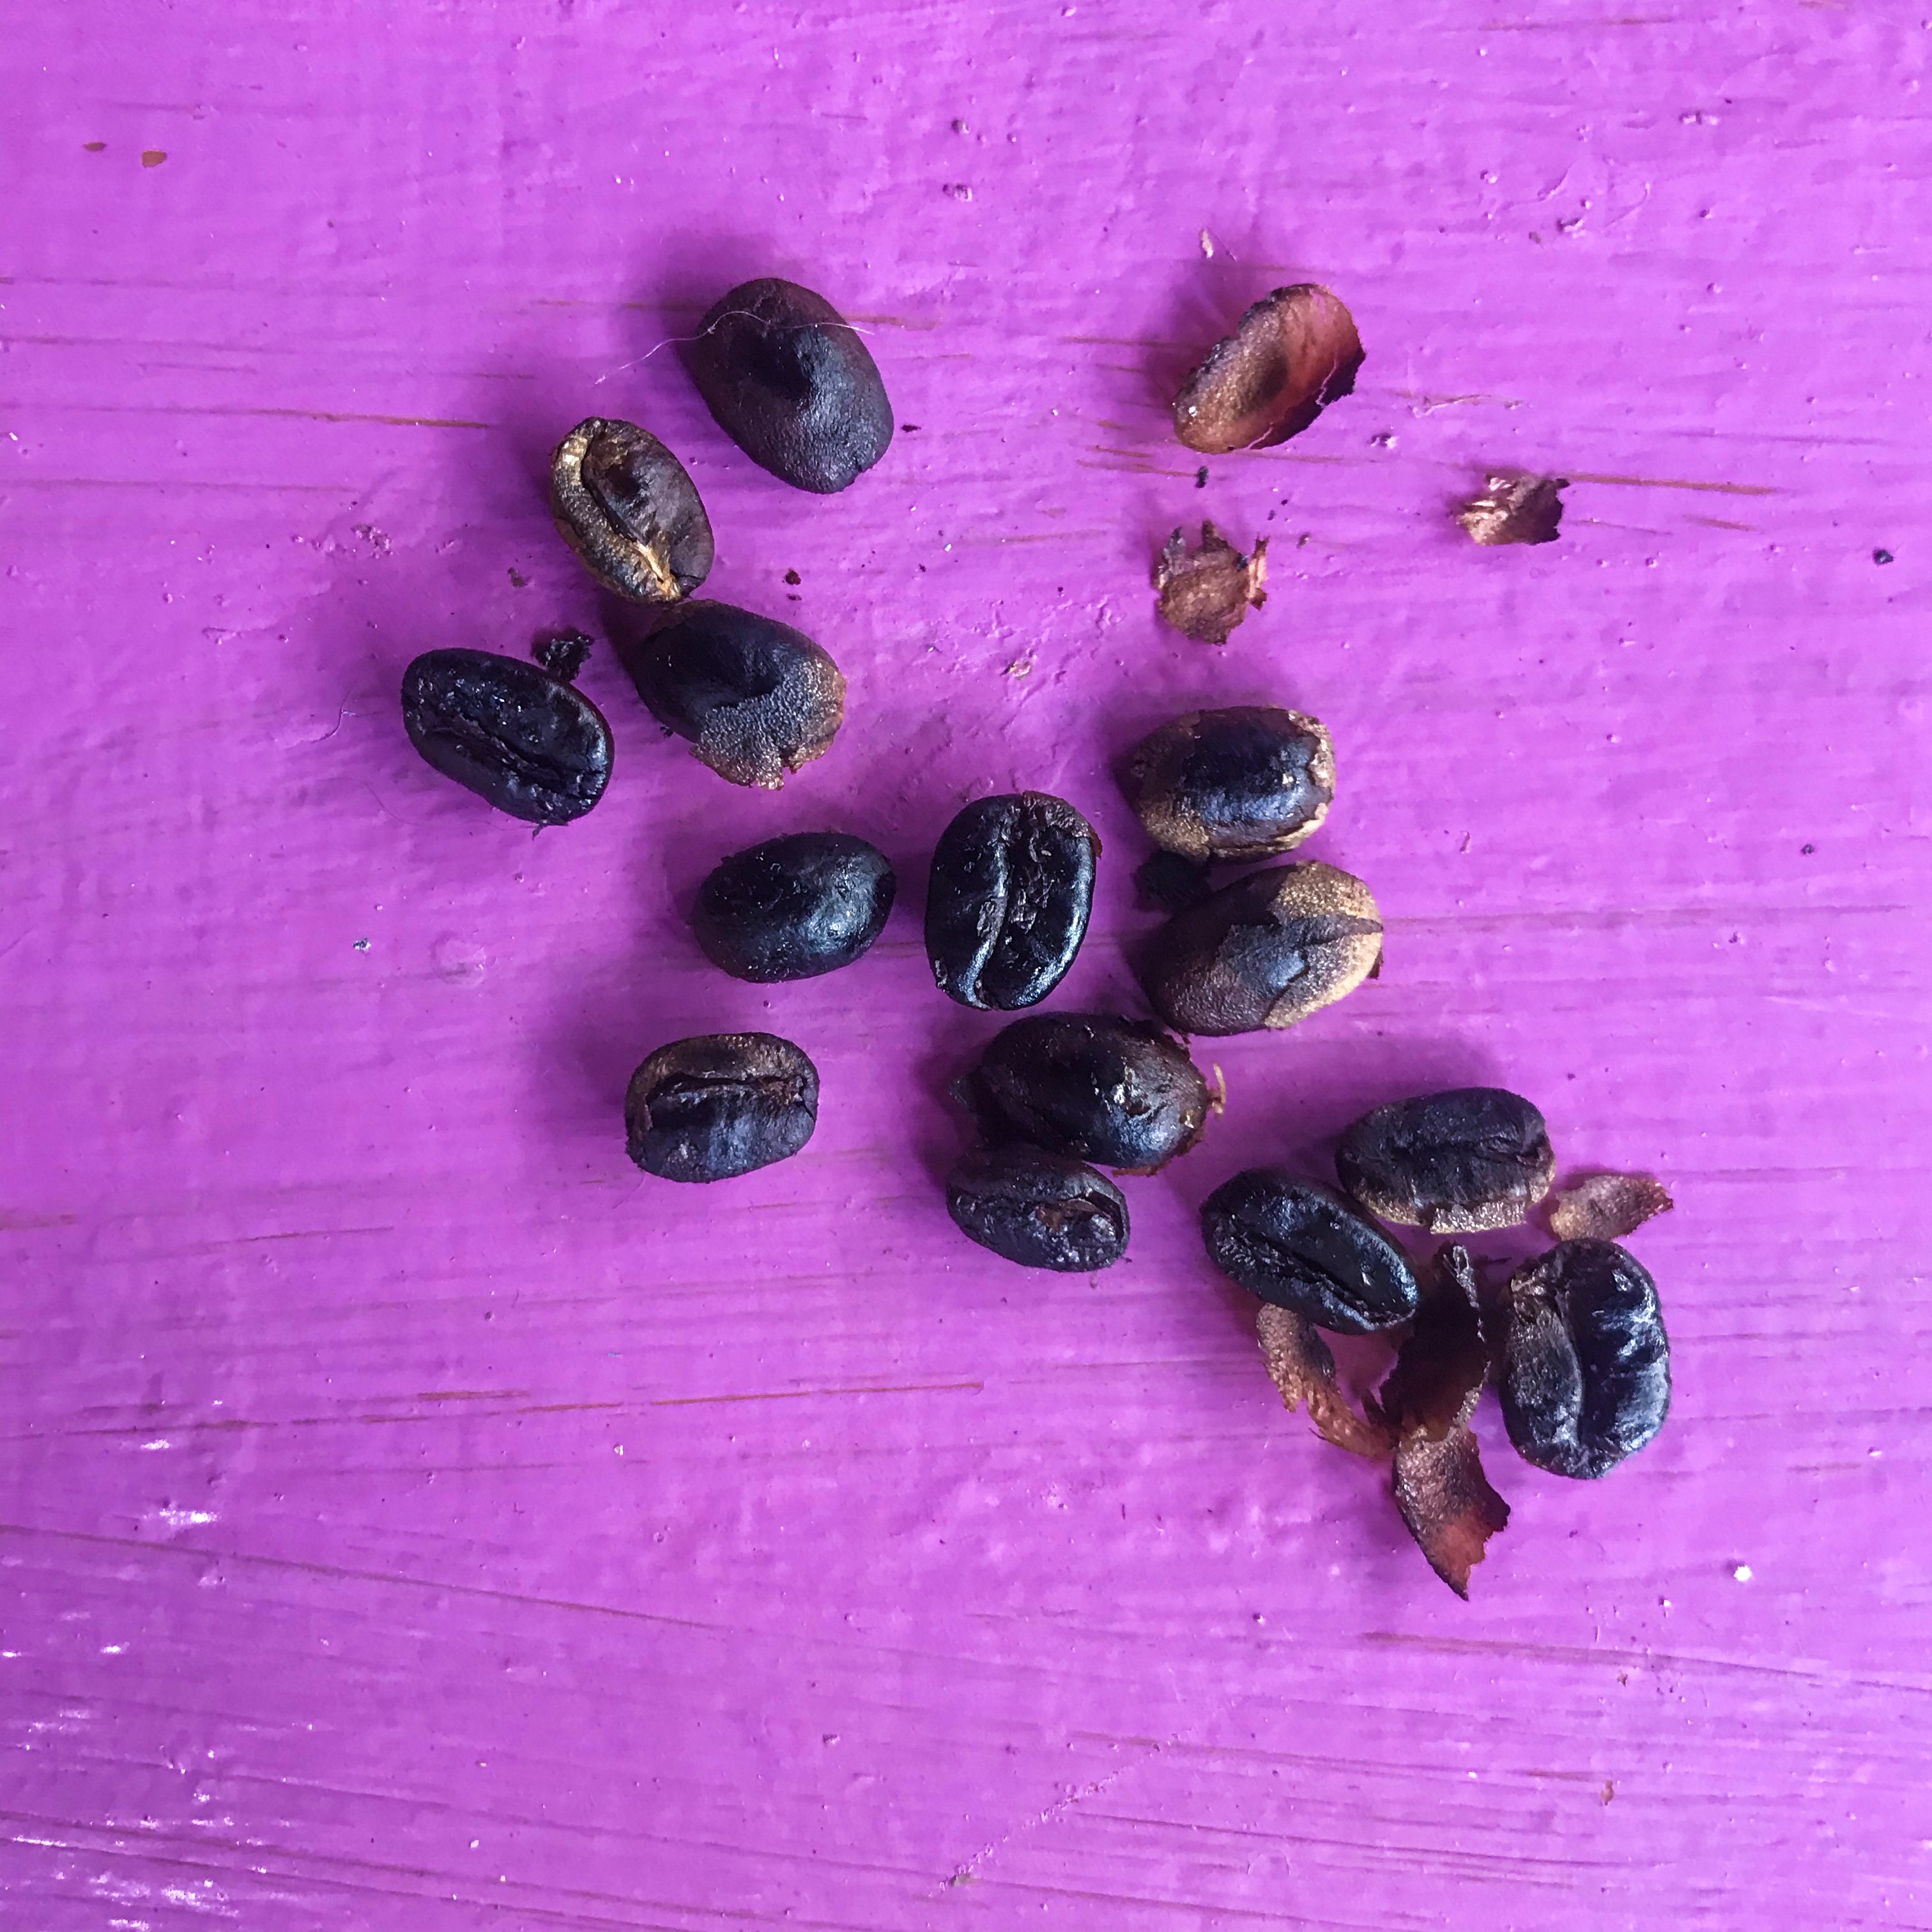
6. Time to Roast
In large production, the coffee silver skin is removed in a polishing machine to prevent the creation of “chaff,” which is the roasted silver skin byproduct. If you’re like us and you don’t have a polishing machine, or the patience to remove the skin by hand (I mean, this has already taken a few days of my time by now, just give me the damn coffee), you can roast the beans with the silver skin on.
Find yourself a pan and place your beans inside on a low heat, constantly stirring and raising the temperature every 2-3 minutes until you’re on a medium setting. You don’t want to burn your beans, but roast them slowly.
I got tired of taking the parchments off so we roasted only enough for 2 cups of coffee this time around. 
I’m so happy to be nearly done this process!
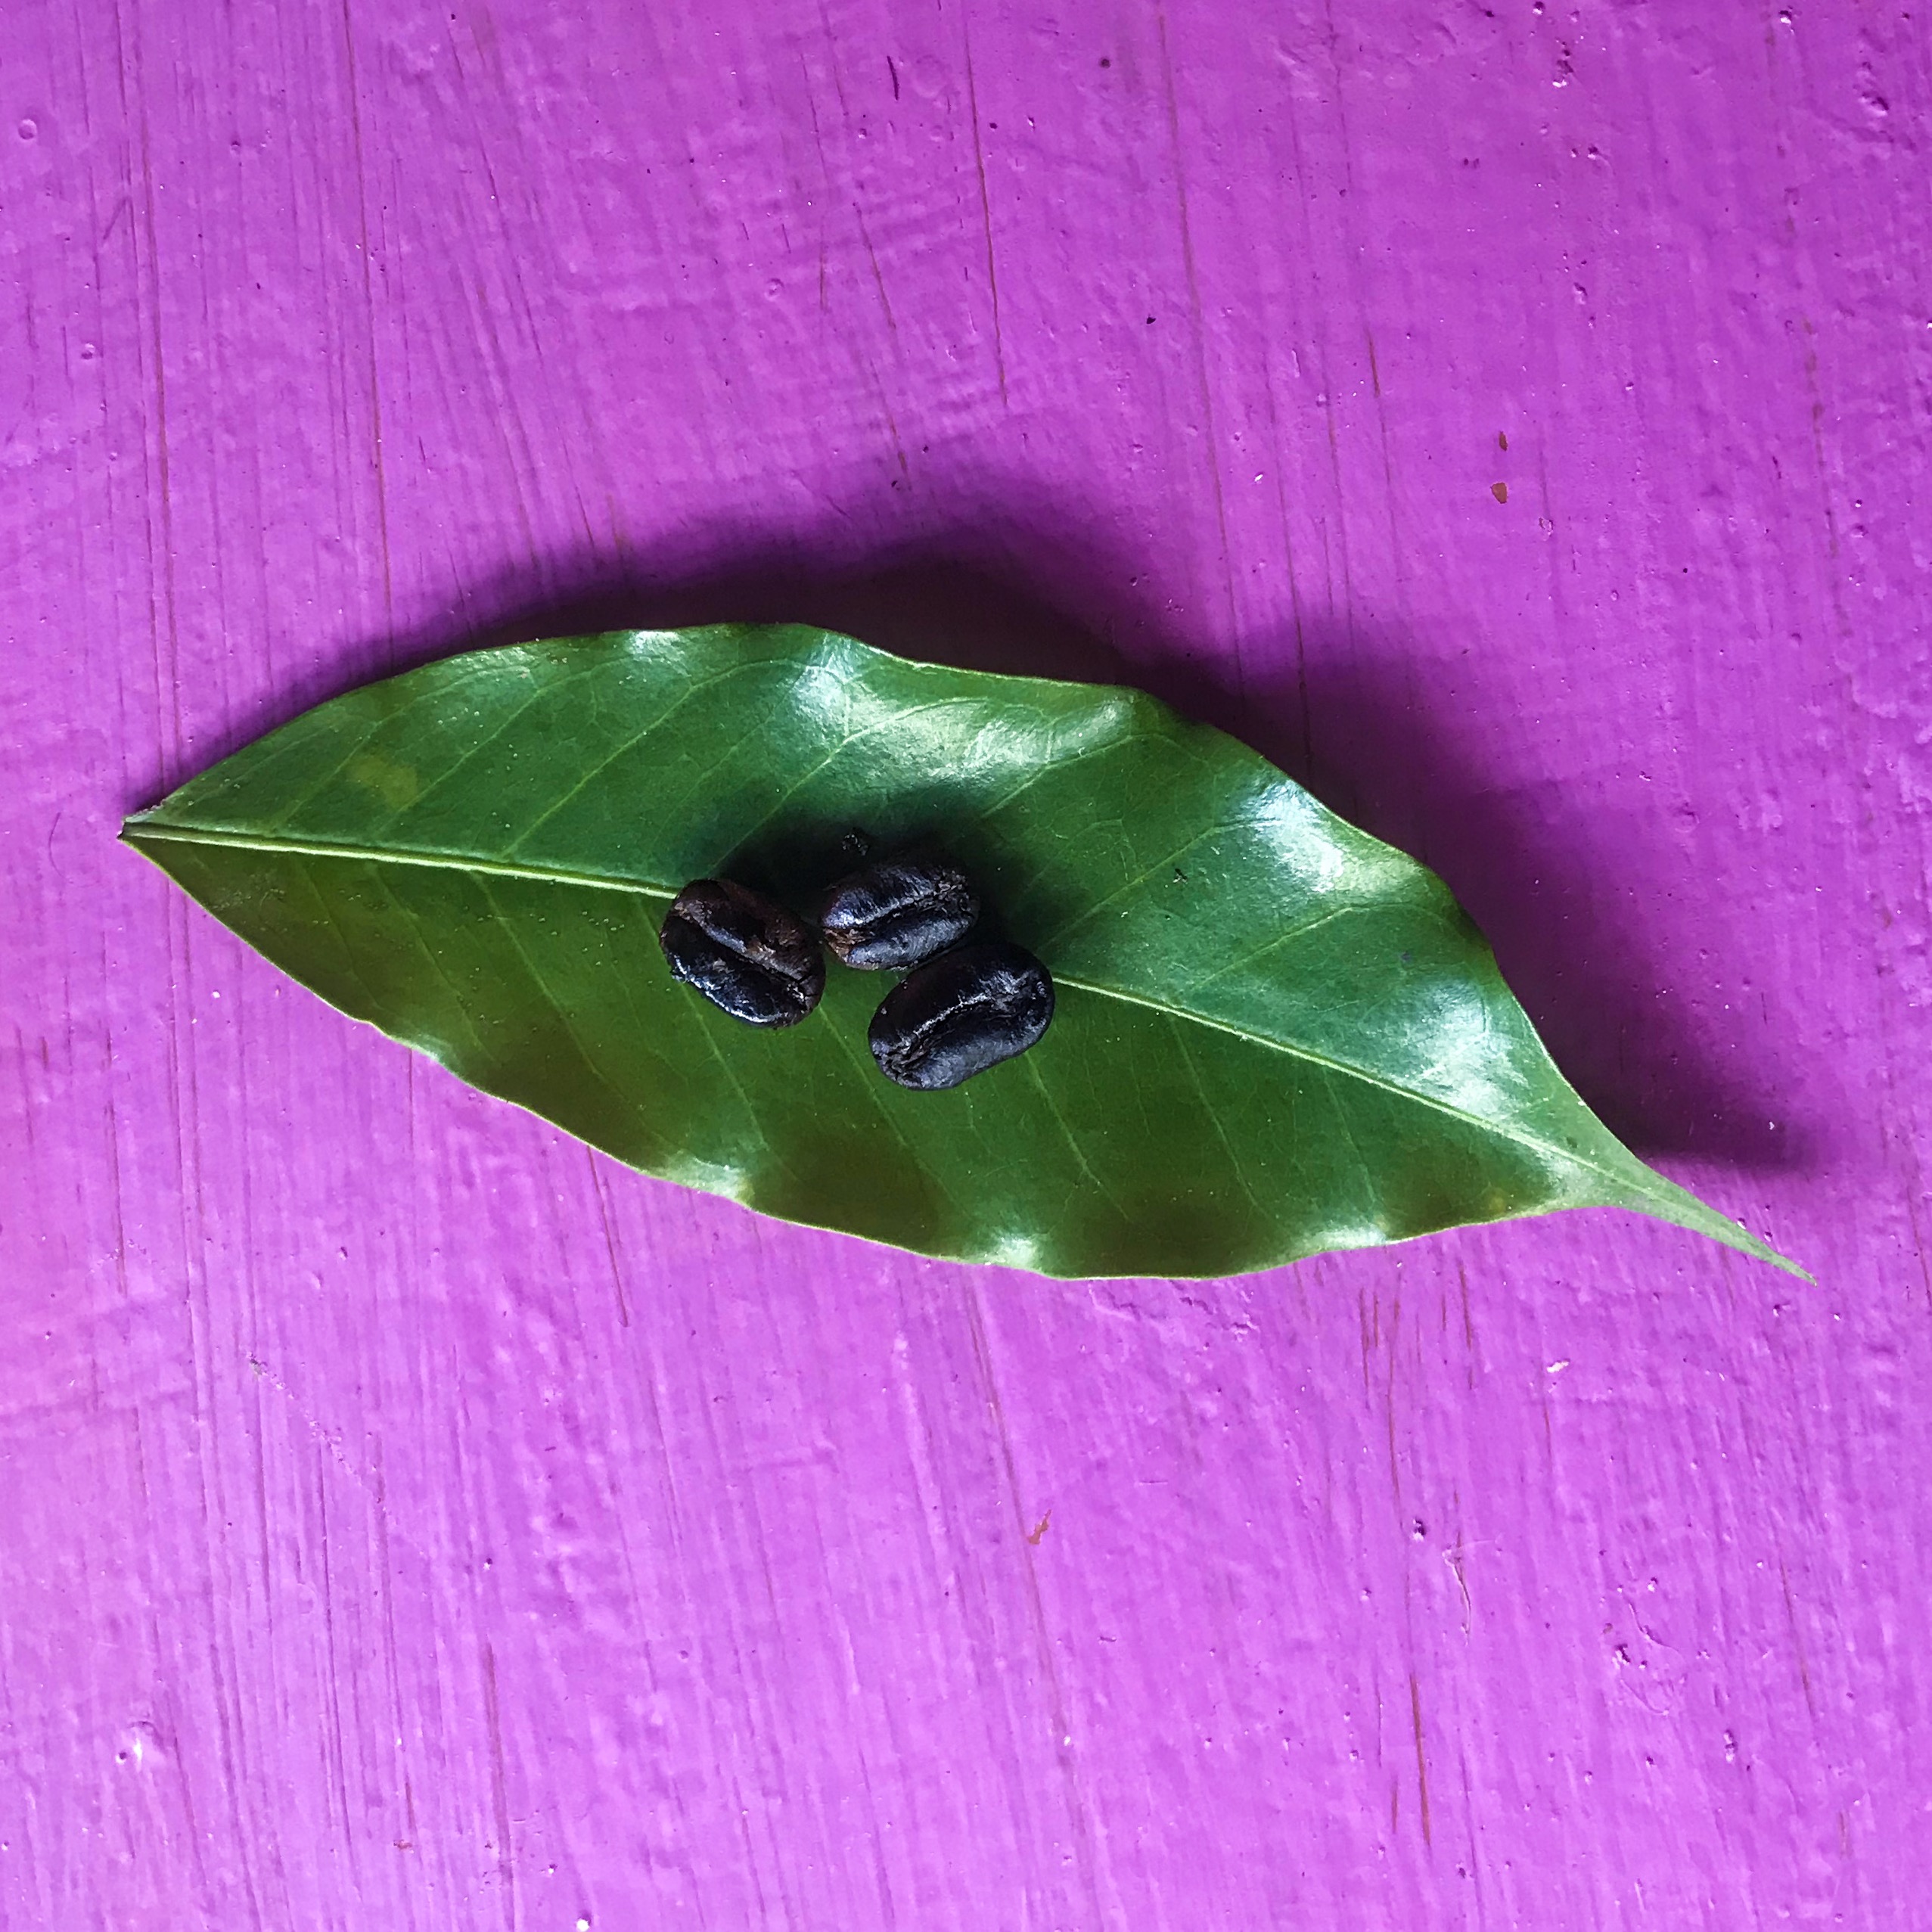
After about 30 minutes you’ll start to smell the right smell: roasted coffee beans! You get to decide how dark you want the roast, but you definitely want to make sure the entire bean is dark brown. Keep stirring continuously!
Once the beans are hot enough the silver skin will start to fall off (chaff), and then can be removed from your pan. If you can’t or don’t want to remove it, it doesn’t really matter, it’s non-toxic, it just alters the flavor of your coffee a little bit (I’m not entirely sure how, we left ours on and it tasted great)!
We roasted for about an hour and found it to be a nice level.
7. Grind and Serve
Once roasted, your beans are like store bought beans and need to be kept air tight to last. Prior to roasting they can last weeks in the open.
Grind your beans with a coffee grinder or magic bullet like we did, and brew with boiling water. They’re perfect in a French Press! oy!
Now it’s time to enjoy!

Great Success!
If you were to go into mass production or sales of your homemade coffee, there are obviously more detailed parts to each step, e.g. humidities and temperatures. This DIY is just a “quick” and easy way for you to enjoy the fruits of your own labor.
And it’s also a reminder for the next time you’re annoyed waiting in line at the cafe, or for your water to boil. Think of the full process it takes to get those beans in your cup and be grateful you’ve bypassed all the serious steps and are just the one drinking it!


Thanks for the coffee 101 I Soo enjoyed it, as I sat and drank and learned, you 2 are the best and so much fun to follow. Thanks enjoy and stay safe ..I loves u2❤️
LikeLike
Thanks for reading!!! 🙂 loves you right back!!
LikeLike
fun post!! 🙂
LikeLike
Thanks Michelle!! 🙂
LikeLike